-
By:
- jayson
- No comment
yamaha outboard wiring diagram pdf
Yamaha outboard wiring diagrams provide essential guidance for maintaining and repairing electrical systems. These detailed visual tools help users understand circuit connections‚ components‚ and troubleshooting processes. Available as PDFs online‚ they simplify complex systems for DIY enthusiasts and professionals‚ ensuring safe and efficient repairs.
Overview of Yamaha Outboard Motors
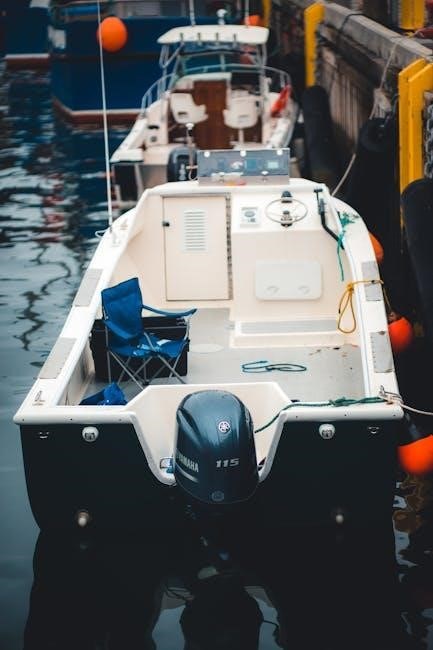
Yamaha outboard motors are renowned for their reliability‚ performance‚ and innovative technology. Designed to power various watercraft‚ these motors range from compact‚ portable models to high-power V6 engines. Known for their fuel efficiency and reduced emissions‚ Yamaha outboards are popular among boaters seeking durability and superior functionality. The company offers a wide range of horsepower options‚ catering to both recreational and commercial marine applications. Advanced features like the V MAX SHO (Valkyrie Max Shore and Hole Shot) and High Thrust series demonstrate Yamaha’s commitment to innovation. With a focus on quality and customer satisfaction‚ Yamaha outboards are backed by extensive service support‚ including detailed manuals and wiring diagrams‚ ensuring optimal maintenance and repair experiences.
Importance of Wiring Diagrams for Maintenance and Repair
Wiring diagrams are crucial for maintaining and repairing Yamaha outboard motors. They provide a visual representation of the electrical system‚ making it easier to identify components‚ connections‚ and potential issues. These diagrams help prevent errors during installations or repairs‚ ensuring safety and compliance with manufacturer standards. By understanding the wiring layout‚ users can troubleshoot problems efficiently‚ such as faulty gauges or ignition systems. Additionally‚ diagrams guide the installation of new components‚ ensuring proper functionality. They are invaluable for both DIY enthusiasts and professional technicians‚ offering clear‚ detailed instructions to keep Yamaha outboards running reliably and prolong their lifespan.
Understanding Yamaha Outboard Wiring Diagrams
Yamaha outboard wiring diagrams detail components‚ connections‚ and electrical pathways. They help users interpret systems‚ identify symbols‚ and understand color codes for effective troubleshooting and repairs.
Key Components of a Yamaha Outboard Wiring Diagram
A Yamaha outboard wiring diagram includes essential elements like wire color codes‚ symbols‚ and detailed connections. It outlines the wiring harness‚ circuit pathways‚ and component locations. The diagram specifies connectors‚ terminals‚ and gauges‚ ensuring proper installation. It also covers ignition systems‚ fuel injectors‚ and electrical controls. Color-coded wires simplify tracing circuits‚ while symbols represent components like fuses‚ relays‚ and sensors. The diagram often includes a legend explaining these symbols and codes. It also details how gauges connect to the engine and electrical systems. Troubleshooting sections help identify issues like faulty connections or blown fuses. This comprehensive guide is crucial for maintaining and repairing Yamaha outboard motors effectively.
How to Read and Interpret the Diagram
Reading a Yamaha outboard wiring diagram begins with understanding its components. Start by identifying the color-coded wires‚ which correspond to specific functions. Symbols represent parts like fuses‚ relays‚ and sensors. Trace circuits to see how components connect‚ ensuring proper flow from power sources to devices. Pay attention to ground wires‚ often colored black or brown‚ which complete circuits. Use the legend or key provided to decode symbols and abbreviations. For troubleshooting‚ follow the diagram to isolate issues like short circuits or open connections. Practice by focusing on one system at a time‚ such as the ignition or fuel injector wiring. This methodical approach helps in diagnosing and resolving electrical problems efficiently.
Sources for Yamaha Outboard Wiring Diagrams
Yamaha outboard wiring diagrams are available through official Yamaha websites‚ online forums‚ and third-party marine repair sites‚ offering detailed PDF resources for DIY enthusiasts and professionals.
Official Yamaha Websites and Manuals
Official Yamaha websites offer authentic wiring diagrams for outboard motors‚ ensuring accuracy and reliability. These resources are typically found in downloadable PDF manuals‚ which include detailed schematics‚ color codes‚ and component explanations. Yamaha’s official support pages provide model-specific diagrams‚ making it easier to identify and troubleshoot electrical issues. Additionally‚ the manuals often include step-by-step guides and safety precautions‚ catering to both novice and experienced users. By accessing Yamaha’s official materials‚ owners can ensure their repairs are done correctly‚ maintaining their motor’s performance and longevity. This makes official sources the most trustworthy option for obtaining wiring diagrams.
Online Forums and Communities
Online forums and communities are invaluable resources for Yamaha outboard wiring diagrams. Websites like the Yamaha Outboard Forum offer expert advice‚ troubleshooting tips‚ and direct links to wiring diagrams. Members often share PDF manuals‚ such as the 6Y5_704 Wiring.pdf‚ and provide guidance for specific models‚ like the 2006 F150. These platforms foster collaboration‚ allowing users to resolve issues collectively. For example‚ threads on diagnosing electrical system problems or fixing gauge issues are common. Many forums also include color-coded wiring explanations and step-by-step installation guides. By engaging with these communities‚ boat owners can access practical solutions and real-world experiences‚ making repairs more manageable and efficient. This peer-driven support is a key asset for DIY enthusiasts and professionals alike.
Third-Party Marine Repair Websites
Third-party marine repair websites offer a wealth of resources for Yamaha outboard wiring diagrams. Sites like EngineAddiction and Seloc Marine provide comprehensive repair guides‚ including detailed wiring diagrams and troubleshooting tips; These platforms often host PDF manuals for various Yamaha models‚ such as the 2006 F150‚ and include color-coded wiring explanations. Additionally‚ repositories of free wiring diagrams for outboard motors‚ covering manufacturers like Yamaha‚ are frequently updated. These websites are invaluable for DIY enthusiasts‚ offering step-by-step installation guides and solutions for common issues like ignition system problems. By leveraging these resources‚ users can access essential information for maintaining and repairing their Yamaha outboards effectively.
Common Issues and Troubleshooting
Common issues include no spark‚ fuel pump failure‚ and ignition problems. Yamaha outboard wiring diagrams help identify faulty circuits and components‚ enabling precise troubleshooting and repairs.
Diagnosing Electrical System Problems
Diagnosing electrical system problems in Yamaha outboards begins with consulting the wiring diagram to identify potential fault points. Start by tracing wires and checking connections for damage or corrosion. Use the diagram to locate key components like ignition switches‚ fuel pumps‚ and sensors. Common issues include no spark‚ faulty gauges‚ or inactive injectors. Test circuits using a multimeter to verify voltage and continuity. Check for blown fuses or tripped circuit breakers. Refer to the color-coded wiring chart to ensure connections match the diagram. Isolate the problem by testing individual components‚ such as the ignition coil or fuel pump relay. Troubleshooting step-by-step helps pinpoint the root cause efficiently‚ ensuring accurate repairs and minimizing downtime.
Fixing Gauge and Instrument Issues
Gauge and instrument issues in Yamaha outboards often involve faulty connections or incorrect wiring. Consult the wiring diagram to verify proper connections between gauges and the main harness. Common problems include dim or inoperative displays‚ incorrect readings‚ or complete gauge failure. Check for loose wires‚ corrosion‚ or damage in connectors. Ensure the gauge harness matches the wiring diagram’s color coding. Test each gauge’s power and ground supply using a multimeter. If a gauge fails to respond‚ replace it or check for software updates. Refer to the diagram for specific pin assignments and functions. Correcting wiring errors and ensuring all connections are secure typically resolves most gauge-related issues‚ restoring accurate performance monitoring.

Best Practices for Installation and Repair
Always follow Yamaha’s official wiring diagrams and guidelines for installation and repair. Use proper tools‚ test connections thoroughly‚ and ensure all safety precautions are strictly followed.
Safety Precautions When Working with Wiring
When working with Yamaha outboard wiring‚ always disconnect the battery to prevent electrical shocks. Use insulated tools to avoid short circuits. Ensure the engine is switched off and in neutral gear. Wear protective gear like gloves and safety glasses. Avoid working in damp conditions or near open flames. Never test wiring with power on; use a multimeter to check for voltage. Follow the wiring diagram precisely‚ and consult the official Yamaha manual for specific guidelines. Grounding the system properly is crucial to prevent damage and ensure safety. Keep flammable materials away and maintain a well-ventilated workspace. Remember‚ incorrect wiring can lead to serious hazards‚ so attention to detail is essential.
Step-by-Step Installation Guide
Begin by disconnecting the battery to ensure safety. Locate and identify all components using the Yamaha wiring diagram. Start by connecting the power supply wires to the battery‚ ensuring proper polarity. Next‚ install the gauges‚ connecting each wire according to the diagram’s color code. Carefully route the wiring harness to avoid damage or interference. Connect the ignition switch and throttle control‚ ensuring secure and weatherproof connections. Test each circuit individually using a multimeter to verify continuity and voltage. Finally‚ reconnect the battery and perform a full system test to ensure everything functions correctly. Always refer to the official Yamaha manual for specific instructions tailored to your motor model.
Yamaha outboard wiring diagrams are invaluable tools for troubleshooting and repairs. They simplify complex electrical systems‚ ensuring safe and efficient maintenance. Always refer to official Yamaha resources for accurate information.
Final Thoughts on Using Yamaha Outboard Wiring Diagrams
Yamaha outboard wiring diagrams are crucial for effective troubleshooting and repairs. They provide clear visual representations of electrical systems‚ enabling users to identify and resolve issues efficiently. Regularly updated diagrams ensure compatibility with the latest models‚ while color-coded wiring simplifies traceability. For optimal results‚ always consult official Yamaha manuals or trusted sources to avoid misinformation. These resources empower boat owners and technicians to maintain their outboards confidently‚ ensuring reliability and performance on the water.