
-
By:
- jayson
- No comment
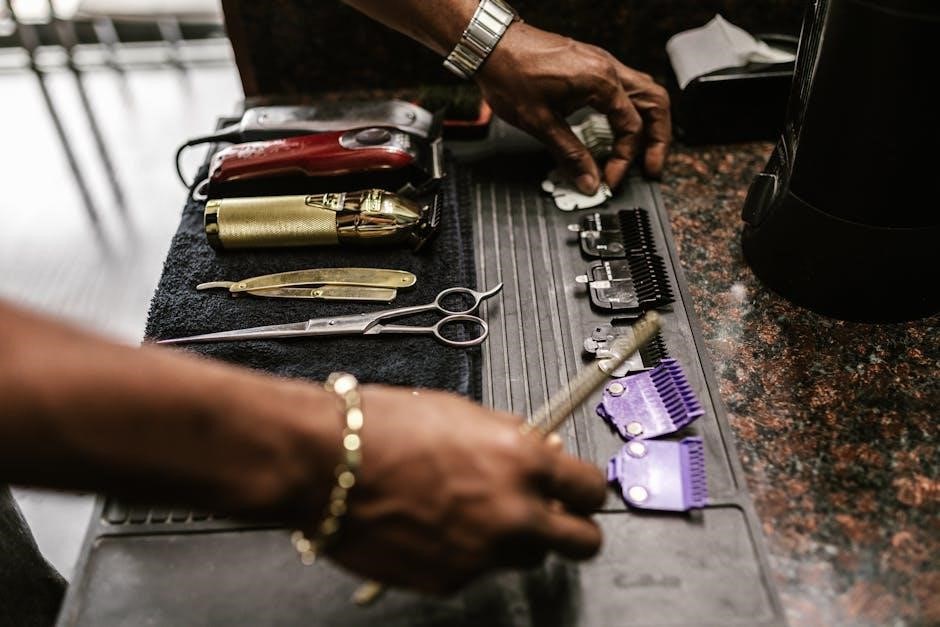
clipper guard guide
Clipper Guard Guide: A Comprehensive Overview (Updated 01/01/2026)
Navigating hair cutting requires understanding clipper guards; these tools dictate length, from subtle trims to substantial styles.
This guide details sizes, techniques, and proper care for optimal results.
Clipper guards are essential attachments for your clippers, fundamentally controlling the length of the hair left on the head. They snap onto the clipper blade, creating a consistent space between the blade and the hair, ensuring an even cut. Without guards, clippers would cut hair extremely close to the scalp – often desired for specific styles, but not for general haircuts.
Understanding guards is crucial for both professional barbers and those cutting hair at home. They empower you to achieve precise lengths, create fades, and execute various hairstyles with confidence. The guard’s size, denoted by a number, directly correlates to the remaining hair length after cutting. This guide will demystify these numbers and their corresponding measurements, helping you navigate the world of hair cutting with ease and precision.
Choosing the right guard is the first step towards a successful haircut, and mastering their use unlocks a world of styling possibilities.
What are Clipper Guards and Why Use Them?
Clipper guards, also known as attachment combs, are plastic or metal pieces that fit over the clipper blade. They act as a barrier, lifting the hair away from the skin before the blade cuts. This creates a uniform hair length, preventing overly short or uneven results. They are typically numbered, with each number representing a specific cutting length, measured in inches or millimeters.
The primary reason to use clipper guards is control. They allow for predictable and repeatable haircuts, essential for achieving desired styles. Guards prevent accidental scalping and provide a safety net for beginners. They’re vital for creating fades, tapers, and layered looks, offering versatility beyond a simple, all-over trim.
Furthermore, guards facilitate consistent results over time, allowing you to maintain your hairstyle easily between professional visits. They transform clippers from a potentially risky tool into a precise instrument for self-expression and grooming.
Understanding Clipper Blade Numbers
Clipper blade numbers are a standardized system for indicating the length of hair left after cutting. Lower numbers signify shorter cuts, progressively increasing as the number rises. This system isn’t about the blade itself, but rather the height the guard elevates the blade above the skin. A #0 blade, often used without a guard, delivers the closest shave, while higher numbers create longer lengths.
It’s crucial to remember that these numbers aren’t universally consistent across all clipper brands, though they generally follow the same pattern. The numbering system begins with #0 (very short) and extends up to #8 (one inch), with fractional increments available for finer adjustments. Understanding this progression is key to achieving your desired haircut.
Essentially, the number represents the approximate distance between the blade and the hair, dictating the final length. Familiarizing yourself with this system empowers you to confidently select the appropriate guard for your specific needs.

The Relationship Between Blade Number and Hair Length
The correlation between clipper blade numbers and resulting hair length is fundamental to achieving precise haircuts. Each number corresponds to a specific height of hair remaining after the cut, measured in both inches and millimeters. A #1 blade leaves approximately 1/8 inch (3mm) of hair, while a #2 blade increases this to 1/4 inch (6mm). This progression continues, with each subsequent number adding another 1/8 inch.
Therefore, a #3 blade yields 3/8 inch (10mm), #4 offers 1/2 inch (13mm), and so on, up to a #8 blade providing a full inch (25mm). This direct relationship allows for predictable and repeatable results. It’s important to note that these are approximate lengths, and slight variations can occur based on hair texture and clipper type.
Mastering this connection empowers users to accurately select the appropriate blade and guard combination for their desired hairstyle, ensuring a consistent and professional finish.

Common Clipper Guard Sizes & Their Uses
Various guard sizes offer versatility in haircuts. From short buzz cuts to longer, styled looks, each guard delivers a distinct length and aesthetic outcome for users.
#1 Clipper Guard (1/8 inch or 3mm)
The #1 clipper guard, set at 1/8 inch (3mm), is a popular choice for achieving a very short, closely cropped haircut. It’s frequently used for creating a clean, defined hairline, tidying up sideburns, or establishing a consistent, short length all over the head. This guard is ideal for those preferring a low-maintenance style or as a foundational step in more complex haircuts like fades.
Professionals often utilize the #1 guard for outlining and detailing, ensuring sharp lines and a polished finish. For individuals, it’s a straightforward option for a quick and easy trim. When using this guard, remember that it leaves very little hair, so proceed cautiously, especially if you’re new to self-haircutting. Multiple passes may be needed for evenness, and always work with clean, dry hair for the best results. It’s a foundational length for blending into longer lengths.
#2 Clipper Guard (1/4 inch or 6mm)
The #2 clipper guard, cutting hair to 1/4 inch (6mm), offers a slightly longer, yet still relatively short, hairstyle. It’s a versatile option frequently employed for all-over cuts, particularly for those desiring a neat and tidy appearance without going too short. This guard is a common starting point for many men’s haircuts and provides a good balance between manageability and style.
Barbers and stylists often use the #2 guard as a base length for creating tapers or fades, blending it seamlessly with longer hair on top. It’s also suitable for maintaining a consistent length on the sides and back of the head. When self-cutting, the #2 guard allows for a bit more forgiveness than the #1, making it easier to achieve an even result. Remember to move the clippers with the grain of the hair for a smoother finish and avoid any patchiness. It’s a great choice for a classic, low-effort look.
#3 Clipper Guard (3/8 inch or 10mm)
The #3 clipper guard, set at 3/8 inch (10mm), delivers a noticeably fuller, yet still manageable, hair length. This size is popular for individuals seeking a bit more coverage than the #2 guard provides, offering a comfortable medium ground between short and long styles. It’s an excellent choice for those wanting a clean-cut look without feeling overly trimmed.
Stylists frequently utilize the #3 guard for creating a more substantial base length when blending into longer hair on top, particularly in layered haircuts. It’s also well-suited for maintaining a consistent length across the entire head, providing a uniform appearance. For those new to self-cutting, the #3 guard offers a greater margin for error, making it easier to achieve a balanced result. Consistent, even strokes with the grain are key to a professional-looking finish. This guard is a solid option for a versatile and stylish haircut.
#4 Clipper Guard (1/2 inch or 13mm)
The #4 clipper guard, measuring 1/2 inch (13mm), represents a significant step towards longer hair lengths, offering a more substantial and noticeable fullness. This guard is frequently chosen by individuals desiring a classic, moderately long hairstyle that still maintains a neat and tidy appearance. It’s a versatile option suitable for various hair types and textures, providing ample coverage and a comfortable feel.
Professionals often employ the #4 guard for creating a balanced look, particularly when transitioning from shorter sides to longer hair on top. It’s ideal for achieving a uniform length across larger sections of the head, ensuring a consistent and polished finish. For beginners, the #4 guard provides a forgiving length, reducing the risk of accidental scalping or uneven cuts. Remember to utilize smooth, even strokes following the natural grain of the hair for optimal results. This guard delivers a reliably stylish and manageable haircut.
#5 Clipper Guard (5/8 inch or 16mm)

The #5 clipper guard, set at 5/8 inch (16mm), bridges the gap between moderate and longer hairstyles, offering a noticeable length while still maintaining manageability. This guard is a popular choice for those seeking a fuller, more textured look without venturing into excessively long territory. It’s particularly well-suited for individuals with thicker hair, as it provides enough length to reduce bulk and create a more balanced silhouette.
Barbers and stylists frequently utilize the #5 guard for creating layered haircuts or adding volume to the crown. It’s also an excellent option for blending longer lengths on top with shorter sides, achieving a seamless transition. When using the #5 guard, remember to work in sections and utilize consistent pressure for an even cut. This length provides a comfortable and stylish option, offering versatility for various hair types and personal preferences. It’s a reliable choice for a polished, yet relaxed, appearance.
#6 Clipper Guard (3/4 inch or 19mm)
The #6 clipper guard, measuring 3/4 inch (19mm), delivers a distinctly longer haircut, ideal for those desiring substantial length and fullness. This guard is frequently chosen for creating classic, traditional hairstyles or for individuals who prefer to maintain a more substantial amount of hair. It’s particularly effective on hair types that don’t naturally hold a lot of volume, as it provides the necessary weight and texture to achieve a fuller appearance.
Stylists often employ the #6 guard for uniform, all-over cuts, or for creating a noticeable contrast between the top and sides of the head. It’s also a suitable option for individuals growing out their hair, offering a manageable length during the transition phase. When utilizing the #6 guard, ensure even saturation and consistent pressure for a uniform result. This length offers a bold and confident look, providing ample styling options and a noticeable presence. It’s a great choice for a robust and well-defined hairstyle.
#7 Clipper Guard (7/8 inch or 22mm)
The #7 clipper guard, set at 7/8 inch (22mm), provides a significantly longer hair length, catering to those who prefer a fuller, more substantial hairstyle. This guard is a popular choice for individuals seeking a noticeable amount of hair on top, while still maintaining some manageability. It’s often used to create styles with texture and movement, allowing for versatile styling options.
Professional barbers frequently utilize the #7 guard for longer layered cuts, or for achieving a softer, more natural look. It’s particularly well-suited for hair types that benefit from added weight and volume. When using this guard, consistent and even strokes are crucial for a uniform result. The #7 guard offers a balance between length and control, making it a versatile option for a wide range of hair types and styles. It’s a fantastic choice for a bold, yet refined, appearance, offering ample opportunity for personal expression.
#8 Clipper Guard (1 inch or 25mm)
The #8 clipper guard, measuring a full 1 inch (25mm), represents one of the longest standard lengths available, ideal for those desiring a substantial amount of hair. This guard is frequently chosen by individuals who prefer a classic, fuller hairstyle, offering significant coverage and a noticeable presence. It’s a go-to for creating styles that demand volume and texture, allowing for a wide array of styling possibilities.
Barbers often employ the #8 guard for achieving a more relaxed, natural look, or for clients specifically requesting longer lengths on top. It’s particularly effective on hair types that require added weight to maintain shape and prevent frizz. Consistent, overlapping passes are essential when using this guard to ensure an even and polished finish. The #8 guard delivers a bold statement, providing ample hair to work with for various styling techniques. It’s a perfect choice for those seeking a truly substantial and expressive hairstyle.

Specialty Clipper Guards & Techniques
Beyond standard guards, advanced techniques unlock creative haircuts. Tapering, blending, and fades require skill, while zero-gap methods deliver incredibly close cuts for detailed work;
Tapering with Clipper Guards
Tapering involves gradually shortening hair length, creating a blended transition from longer hair on top to shorter hair on the sides and back. Achieving a professional taper with clipper guards requires a systematic approach and understanding of guard sizes. Begin with a larger guard size, typically a #4 (1/2 inch), and clip the lower portion of the hair, establishing the initial taper line.
Next, switch to a smaller guard, such as a #3 (3/8 inch), and clip slightly higher, overlapping the previous line to blend the transition. Continue this process, decreasing the guard size with each pass – #2 (1/4 inch), then #1 (1/8 inch) – until you reach the desired taper effect. Feathering the clipper upwards as you approach the longer hair prevents harsh lines.
Consistent, light passes are crucial for a smooth, natural-looking taper. Remember to work with the grain of the hair for optimal results. Practice and patience are key to mastering this technique, allowing for customized tapers to suit individual preferences and hair types.
Blending Clipper Guard Sizes
Seamless blending between different clipper guard sizes is essential for avoiding harsh lines and achieving a polished haircut. The key lies in overlapping each guard size slightly with the previous one, creating a gradual transition. After using a larger guard, don’t simply stop; instead, move upwards with the next smaller size, covering approximately half the height of the previous cut.
Employ a “flicking” motion as you reach the upper limit of each guard size, lifting the clippers away from the head to soften the line. This prevents a distinct demarcation between lengths. Multiple passes with each guard, using light pressure, further refine the blend. Consider angling the clippers slightly to follow the natural contours of the head.
Visual inspection throughout the process is vital. Use a mirror to check for any visible lines and adjust your technique accordingly. Mastering blending takes practice, but the result is a professional-looking haircut with a natural, flowing transition between lengths.
Using Clipper Guards for Fades
Achieving a fade with clipper guards requires a systematic approach, transitioning from shorter lengths at the bottom to longer lengths higher up. Begin with the shortest guard size – often a #1 or #2 – and work upwards, establishing the lowest point of the fade. Gradually increase the guard size with each subsequent pass, overlapping each length to create a smooth gradient.
The key to a clean fade is precision and patience. Avoid rushing the process; slow, controlled movements are crucial. Pay close attention to the angle of the clippers, ensuring they follow the natural curvature of the head. Regularly check your work in a mirror to identify any uneven areas or harsh lines.
Blending is paramount. Utilize the flicking technique described earlier to soften transitions between guard sizes. Remember, a successful fade isn’t about abrupt changes in length, but a seamless, gradual progression.
Zero-Gap Clipper Technique
The zero-gap technique is a specialized method for achieving extremely close cuts, often used for outlining, detailing, or creating skin fades. It involves removing the clipper guard entirely and adjusting the blade to sit as close as possible to the skin. This requires careful adjustment of the clipper blade lever – typically moving it to its lowest setting.
This technique demands precision and a steady hand. It’s best suited for experienced users, as improper execution can easily lead to irritation or uneven results. Always work slowly and deliberately, following the grain of the hair. Use light pressure and avoid pressing the clippers too hard against the skin.
Before attempting a zero-gap cut, ensure the clippers are clean and well-lubricated. Regularly check the blade temperature to prevent overheating. This technique is ideal for crisp lines and detailed work, but should be used cautiously.

Clipper Guard Maintenance & Care
Proper maintenance extends guard life and ensures consistent cuts. Regular cleaning removes hair buildup, while careful storage prevents damage. Inspect guards frequently for wear.
Cleaning Clipper Guards
Maintaining pristine clipper guards is crucial for hygiene and performance. After each use, thoroughly remove accumulated hair. A small brush, like a toothbrush, is ideal for dislodging stubborn strands from the guard’s teeth and surface. For a deeper clean, detach the guards from the clipper blade – if your model allows – and wash them with warm, soapy water.
Avoid harsh chemicals or abrasive cleaners, as these can damage the plastic or metal components. Ensure the guards are completely dry before reattaching them to the clipper. Damp guards can lead to rust or corrosion, especially on metal components, and can also affect the clipper’s performance. Regular cleaning prevents buildup that can cause uneven cuts and potentially harbor bacteria. A clean guard contributes to a smoother, more professional haircutting experience, and prolongs the lifespan of your valuable grooming tools.
Storing Clipper Guards
Proper storage safeguards your clipper guards from damage and ensures their longevity. Ideally, store guards in a clean, dry location, away from direct sunlight and extreme temperatures. A dedicated storage case or pouch, often included with clipper sets, is an excellent option. This prevents them from getting lost, scratched, or bent.

If a case isn’t available, a small plastic container or even a labeled zip-lock bag can suffice. Avoid tossing loose guards into a drawer where they can be easily misplaced or damaged by other objects. Keeping them organized by size makes selecting the correct guard quick and easy during haircuts. Regularly inspect stored guards for any signs of wear and tear. Proper storage not only protects your investment but also maintains the precision and effectiveness of your clipper system, ensuring consistently excellent results every time you groom;
Recognizing Worn or Damaged Guards
Identifying worn or damaged clipper guards is crucial for maintaining consistent and safe haircuts. Look for visible signs of wear, such as chipped plastic, bent metal clips, or cracks in the guard’s structure. These imperfections can lead to uneven cuts and potential scalp irritation.

A telltale sign is inconsistent hair length during a cut; if the guard isn’t providing a uniform trim, it’s likely damaged. Also, check if the guard fits securely onto the clipper blade – a loose fit indicates wear. Regularly inspect the guard’s surface for rough edges or burrs that could snag hair. Replacing worn guards is essential for achieving professional-quality results and preventing discomfort. Continuing to use damaged guards compromises the precision of your clipper set and can ultimately lead to more significant issues, so proactive replacement is key.

Orlando Clipper Boats: A Historical Perspective
The Orlando Boat Company, founded in Orlando, Florida, initially specialized in aluminum hull boats around 1962, later adding fiberglass models. These vessels gained a local following.
The Orlando Boat Company: Origins and Location
The Orlando Boat Company emerged in Orlando, Florida, establishing itself as a builder of aluminum boats in the early 1960s. Initially, operations were based near the Herdon airport, a strategic location facilitating access and distribution. As demand grew and the company expanded its offerings to include fiberglass models, a relocation became necessary.
Around the mid-1960s, The Orlando Boat Company moved its facilities to Ocoee, a city situated just west of Orlando and adjacent to Winter Garden. This new location provided ample space for increased production and allowed for better logistical operations. The company’s founder and early management team focused on crafting durable and reliable boats suited for the Florida waterways.
The company quickly became known for its “Orlando Clipper” line, a name that evoked images of speed and dependability. The early success was largely attributed to a commitment to quality craftsmanship and a deep understanding of the local boating community’s needs. This dedication laid the foundation for a lasting legacy in the regional boat-building industry.
Early Orlando Clipper Models (Aluminum Hull)
The initial Orlando Clipper boats were exclusively constructed with aluminum hulls, a material chosen for its lightweight nature, durability, and resistance to corrosion – crucial qualities for Florida’s aquatic environment. These early models, primarily open designs, catered to anglers and recreational boaters seeking a reliable and easily maintained vessel.
A popular early model was the 15-9, a 15-foot, 9-inch open boat known for its stability and responsiveness. These boats typically featured mid-cable steering positioned on the right side, a common configuration for the era. Owners often describe these Clippers as requiring “plenty of TLC,” reflecting the need for regular maintenance inherent in aluminum boat ownership.
The aluminum construction allowed for relatively simple repairs and modifications, making them appealing to boaters who enjoyed hands-on maintenance. These early Clippers represented a blend of practicality and affordability, establishing a strong foothold in the local market and setting the stage for future expansion into fiberglass construction.
Identifying Orlando Clipper Boat Years and Models
Determining the precise year and model of an Orlando Clipper boat can be challenging, as records from the early years are often incomplete. However, several clues can aid in identification. The hull identification number (HIN), typically stamped on the transom, is a primary source of information. A HIN like “48-14-1370” reveals details about the manufacturer (Orlando Boat Company) and potentially the year of construction.
The stamped number itself often contains coded information regarding length and sequential build order. Registration documents may also provide some clues, though they are not always accurate. Examining the boat’s features – steering configuration (mid-cable versus other systems), hull design (open versus cabin), and overall length – can further narrow down the possibilities.
Consulting with Orlando Clipper boat owners’ groups and online forums can be invaluable, as experienced enthusiasts often possess detailed knowledge of specific models and their characteristics. Careful observation and collaborative research are often necessary to accurately identify these classic aluminum boats.
Orlando Clipper Boat Registration and Hull Numbers
Understanding Orlando Clipper boat registration and hull numbers is crucial for ownership and historical tracking. The hull identification number (HIN), a unique 12-character alphanumeric code, is permanently affixed to the vessel’s transom. This number serves as the boat’s fingerprint, providing vital information to authorities and potential buyers.
The HIN typically begins with a three-digit manufacturer identification code (MIC) assigned to The Orlando Boat Company. Following the MIC are five digits representing the hull serial number, and the final four digits indicate the year of manufacture. Registration numbers, issued by state boating agencies, are separate from the HIN and are subject to renewal.
Maintaining accurate registration and a clearly visible HIN is essential for legal operation and preventing theft. Owners should document both numbers and keep copies readily available. Online databases and forums dedicated to Orlando Clippers often allow owners to share HIN information, aiding in the preservation of the boat’s history and facilitating parts sourcing.
Orlando Clipper Boat Club & Community
A vibrant community surrounds the preservation and enjoyment of Orlando Clipper boats. Online forums and dedicated clubs provide platforms for owners to connect, share knowledge, and assist each other with restoration projects and maintenance tips. These groups are invaluable resources for locating rare parts, deciphering historical information, and learning about specific model quirks.
The enthusiasm within the Orlando Clipper community stems from the boats’ unique history and enduring quality. Members frequently organize rendezvous and boat shows, showcasing their meticulously restored vessels and fostering camaraderie. These events offer opportunities to learn from experienced owners and appreciate the craftsmanship of these classic aluminum hulls.
Participating in the Orlando Clipper community not only enhances the ownership experience but also contributes to the preservation of a significant piece of boating history. Sharing experiences and expertise ensures that these iconic boats continue to grace the waterways for generations to come.