
-
By:
- jayson
- No comment
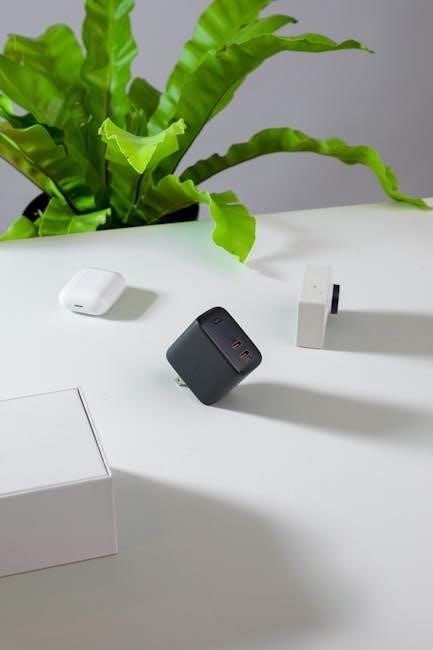
casely power pod instructions
Features and Specifications of the Casely Power Pod
The Casely Power Pod offers magnetic wireless charging, MagSafe compatibility, portable design, LED power indicators, and a high-quality polymer battery for safe and efficient charging on-the-go.
1.1 Magnetic Wireless Charging
The Casely Power Pod features magnetic wireless charging, enabling seamless attachment to compatible devices. It supports MagSafe technology for iPhone models, ensuring a secure and efficient charging experience. The built-in magnet allows easy alignment and hands-free charging. For non-MagSafe devices, the included adhesive magnetic ring provides compatibility. This feature eliminates the need for cables, offering a convenient and clutter-free charging solution on the go.
1.2 MagSafe Compatible Technology
The Casely Power Pod is designed with MagSafe compatible technology, ensuring seamless integration with MagSafe-enabled devices. It provides a secure magnetic connection for efficient wireless charging. Compatible with iPhone models supporting MagSafe, it eliminates the need for precise alignment. The included adhesive magnetic ring allows MagSafe functionality for non-compatible cases or devices, enhancing versatility. This technology ensures a safe and efficient charging experience, perfect for everyday use.
1.3 Portable Wireless Charging
The Casely Power Pod is designed for ultimate portability, offering wireless charging on-the-go. Its slim and lightweight design makes it easy to carry in a bag or pocket. With MagSafe compatibility, it provides seamless charging without the need for cables. The Power Pod is perfect for travel, ensuring your devices stay charged anywhere. Its compact size and wireless functionality make it an ideal solution for everyday use, keeping you connected without the hassle of tangled wires.
1.4 Accurate LED Power Indicators
The Casely Power Pod features LED power indicators that provide clear feedback on its status. The lights display battery levels, charging progress, and connectivity. When charging, the LEDs glow red, and when fully charged, they turn green. These indicators ensure you stay informed about your Power Pod’s operation. Additionally, they help monitor the charging process, offering a reliable visual guide for optimal performance and safety during use.
1.5 High-Quality, Safe Polymer Battery
The Casely Power Pod is equipped with a high-quality, safe polymer battery designed for reliable performance and extended longevity. This advanced battery technology ensures efficient charging while maintaining safety standards. It is built to prevent overheating and features safeguards against overcharging, short circuits, and excessive current flow. The polymer battery provides a lightweight and durable power solution, making it ideal for on-the-go use without compromising safety or efficiency.

Casely Power Pod Usage Instructions
The Casely Power Pod offers straightforward usage with step-by-step guidance for charging, attaching, and powering on, ensuring easy and efficient wireless charging on the go.
2.1 Step 1: Check the Indicator Lights
To begin using your Casely Power Pod, start by checking the indicator lights. The Power Pod features four white LED indicators and a red light. When turned on, the white lights will illuminate, and the red light will turn green once connected to a device. Ensure the lights function properly before proceeding. If the lights do not activate, check the power button. Note that holding the power button for more than a second may cause it to malfunction. This step ensures your Power Pod is ready for use.
2.2 Step 2: Charge Your Power Pod
Next, charge your Casely Power Pod using the included USB-C charging cable. Connect the USB-C end to the Power Pod and the other end to a compatible charger. The LED indicators will show the charging progress. It typically takes 2-3 hours to fully charge. Avoid leaving the Power Pod charging overnight or for extended periods. Use only the provided USB-C cable for safety. Once fully charged, the LED lights will indicate readiness for use.
2.3 Step 3: Apply the Magnetic Adhesive Ring
Locate a clean, flat surface on your phone or case for the magnetic adhesive ring. Peel the backing and align the ring with your device, ensuring it’s centered. Press firmly to secure it. This ring enables MagSafe compatibility for non-MagSafe devices. If using a case, the ring must be placed on the outside of non-MagSafe cases for proper functionality. Ensure the surface is dry and free of debris for a strong bond.
2.4 Step 4: Attach Your Power Pod
Align the Power Pod with the magnetic adhesive ring on your device. Gently press until it snaps securely into place. Ensure proper alignment for a strong magnetic connection. The Power Pod will automatically begin charging once attached. Verify the placement by checking the LED indicators, which will light up to confirm the connection. Make sure the surface is clean and dry for a secure attachment. If using a case, ensure the ring is on the outside for proper functionality;
2.5 Step 5: Power On & Begin Charging
Press the power button once to turn on the Power Pod. The LED indicators will light up, confirming it’s active. Once attached to your device, charging begins automatically. The red LED will turn green when charging starts. If the button is held too long, the Power Pod won’t respond. Ensure the device is properly aligned and the surface is clean for optimal charging. Avoid exposing the Power Pod to extreme heat and limit device usage during charging for best results.

Safety Precautions and Guidelines
Use only Casely-approved chargers to avoid fire risks. Avoid overnight charging and extreme heat. Do not use damaged cables or chargers. Properly dispose of batteries as per local guidelines to ensure safety and environmental protection.
3.1 General Safety Warnings
Read all instructions and warnings before using the Casely Power Pod. Use only Casely-approved chargers to avoid fire hazards. Do not charge overnight or for extended periods. Keep the device away from extreme heat, water, or flammable materials. Avoid using damaged cables or chargers, as this may cause injury or damage. Properly dispose of batteries according to local guidelines to ensure safety and environmental protection. Follow all safety guidelines to prevent accidents and ensure optimal performance.
3.2 Charging Guidelines and Restrictions
The Casely Power Pod should only be charged with approved USB-C chargers to prevent fire risks. Avoid charging overnight or for extended periods beyond 3 hours. Do not use damaged cables or chargers, as this may cause injury or damage. Keep the device away from extreme heat and monitor it while charging. For optimal performance, limit phone usage during charging to maximize battery efficiency. Always follow recommended charging practices to ensure safety and longevity.

3.3 Proper Disposal Instructions
Dispose of the Casely Power Pod battery responsibly. If your Power Pod is part of a recall, stop using it immediately and follow local lithium-ion battery disposal guidelines. Do not crush or burn the battery. Return it to Casely or recycle at authorized facilities. Proper disposal ensures environmental safety and prevents potential hazards. Always adhere to local regulations for electronic waste disposal.
Compatibility and Device Support
The Casely Power Pod supports MagSafe-compatible devices, wireless charging-enabled phones, and works with non-MagSafe cases using the adhesive magnetic ring. Not compatible with Apple Watch.
4.1 Compatible Devices
The Casely Power Pod is designed to work seamlessly with MagSafe-compatible devices, including iPhone 12, 13, 14, and 15 series. It supports wireless charging for any Qi-enabled smartphone, ensuring versatile compatibility. The Power Pod also works with non-MagSafe cases when paired with the provided adhesive magnetic ring, enhancing its universal appeal. However, it is not compatible with the Apple Watch, making it primarily suited for smartphone users seeking convenient, on-the-go charging solutions.
4.2 Supported Cases and Accessories
The Casely Power Pod works seamlessly with MagSafe-compatible cases, such as Casely’s Classic and Bold MagSafe cases for iPhone 12, 13, 14, and 15 series. For non-MagSafe cases, the included adhesive magnetic ring enables compatibility. The ring must be placed on the outside of non-MagSafe cases for proper functionality. Additionally, the Power Pod supports charging through USB-C, making it a versatile accessory for various devices and cases, ensuring universal compatibility and convenience for users.
Troubleshooting Common Issues
If the Power Pod doesn’t turn on, ensure it’s fully charged. For devices not charging, check connections and LED indicators. Restart the Power Pod if issues persist.
5.1 Power Pod Not Turning On
If the Power Pod doesn’t turn on, ensure the battery has charge. Press the power button once to activate it. If it still doesn’t respond, check for proper charging and LED indicators. Verify the USB-C connection is secure. Allow the Power Pod to charge for at least 30 minutes. If issues persist, reset the device by pressing the power button twice rapidly. Contact Casely support if the problem continues.
5.2 Device Not Charging
If your device isn’t charging, ensure proper alignment with the Power Pod’s magnetic surface. Verify the magnetic ring is correctly applied to non-MagSafe cases. Restart the Power Pod by pressing the power button twice. Check if your phone’s battery is in “Optimized Battery Charging” mode, which may limit charging speed. Avoid using power-intensive apps while charging. If issues persist, try a different USB-C cable or contact Casely support for assistance.
Accessories and Additional Tools
- Adhesive Magnetic Ring: Attaches to non-MagSafe cases or devices, enabling magnetic charging compatibility.
- USB-C Charging Cable: Included for charging the Power Pod or connecting it to devices via cable.
- Adhesive Ring Placement Tool: Assists in accurately applying the magnetic ring for optimal performance.
6.1 Adhesive Magnetic Ring
The Adhesive Magnetic Ring is included with each Power Pod to enable MagSafe compatibility for non-MagSafe devices or cases. It attaches directly to the back of your phone or the outside of a non-MagSafe case, ensuring a secure magnetic connection. The ring is easy to apply and allows seamless charging with the Power Pod. For optimal use, the ring should not be placed under a case. This accessory enhances versatility for various devices and cases.
6.2 USB-C Charging Cable
The USB-C charging cable is included for charging the Power Pod. It connects to a USB-C power source, ensuring efficient charging. For optimal performance, use the provided cable or a compatible USB-C charger. Avoid using non-Casely chargers to prevent potential damage or safety risks. The cable supports fast charging, helping to replenish the Power Pod’s battery quickly. Proper use of the USB-C cable ensures reliable charging and maintains the longevity of the product.
6.3 Adhesive Ring Placement Tool
The Adhesive Ring Placement Tool is designed to assist in accurately positioning the magnetic adhesive ring on your device. It ensures proper alignment and secure attachment, preventing misplacement. The tool simplifies the process of applying the ring to non-MagSafe cases or phones, ensuring optimal compatibility with the Power Pod. Its compact design makes it easy to use and store, providing a hassle-free experience for users. This tool is essential for achieving a reliable connection between your device and the Power Pod.